Sunday, October 18, 2009

Wiring up the PMs for Power

Let’s delve into wiring the power for the Port Multipliers. This is probably one of the most important areas to get right or you’ll be chasing intermittent issues and you’ll have to rip apart the server which is time consuming.

In my case, I went with just a single 1200W Thermaltake Power Supply. I did this mainly because I hate cramped cases and 2 power supplies will make the case cramped and difficult to access components on the motherboard. The second reason and probably more important reason is that I already had a 1200W PS lying around!

If you do go the two Power Supply route instead, I’d recommend a 750W or larger power supply to power the Drive/PM Section. On initial spin up, these drives pull a lot of power.

Also, just make sure you get a good quality power supply – this is the one area where you want to get the best quality possible.

So in my design, the 1200W Thermaltake Power Supply has 4 main power rails, 3 of which we can tap into for power. The first power rail (black modular connectors on the power supply) is your standard peripheral power rail which consists of 4 Modular Connectors that support standard 5V/12V devices. We’ll be using this power rail to provide 5V power to the port multipliers (3 PMs per Power Supply Modular Connector) and the 12V lines will provide power for the case fans as needed.

The second power rail which we don’t have real access to is for the motherboard.

The 3rd and 4th power rails (red module connectors on the power supply) are designed to support high-end graphic cards or power hungry PCI-E cards and only supply 12V (no 5V taps available), but we have a total of 6 module connectors which is over 20 actual 12V dedicated yellow/12V wires – more than enough for a dedicated 12V run for each PM.


One of the nice things about the PCI-E Power Connectors is that they can support up to 72A at 12V (36A per RAIL). These will be perfect for providing the 12V power to the port multipliers. Here’s a chart of the max power available on each rail.


For the actual wiring on the PM side, I took standard 90 degree Molex Y connector type cable (http://www.svc.com/fc444-28.html) and cut it. Please note that you will need the 90 degree Molex connectors as the standard Molex power connectors are too large and the port multipliers won’t fit into the case if you use them.

I then took some red, yellow and black 16AWG stranded core wire and started making my cable assemblies, being careful to bundle the 5V Ground Line with the 5V/Red Cable and the 12V Ground Line with the 12V/Yellow Cable. I’m not sure if it is okay to cross the ground lines across the rails, but better safe than sorry.

When you wire up the actual PM, what you DO NOT want to do is something like this:

16AWG PS Line -> 20AWG PWR CONN on PM -> ... -> 20AWG PWR CONN

Instead you want something like this:

16AWG PS Line -> 20AWG PWR CONN ON PM
              -> 20AWG PWR CONN ON PM


The reason the second design works better is because most of the Y cables that you'll purchase will use 20AWG or even thinner wire. By having a nice thick 16AWG wire feed from the power supply, we allow the PMs to tap into a "16AWG Power Bus" versus tapping into a "20AWG Power Bus". The wire thickness may not seem like much, but in my experience it makes the difference between having 5 drives on a PM BackPlane that power up and 5 drives that don't.

When hooking up to the actual power supply, here's the basic layout of connections:

Rail 1 – Black PS Plug 1 -> 5V -> PMs 1 to 3
Rail 1 – Black PS Plug 2 -> 5V -> PMs 4 to 6
Rail 1 – Black PS Plug 3 -> 5V -> PMs 7 to 9
Rail 1 – Black PS Plug x -> 12V -> Fans in System


Rail 3 – Red PS Plug 1 -> 12V Wire 1 -> PM1
Rail 3 – Red PS Plug 1 -> 12v Wire 2 -> PM2
Rail 3 – Red PS Plug 1 -> 12v Wire 3 -> PM3


Rail 3 – Red PS Plug 2 -> 12v Wire 1 -> PM4
Rail 3 – Red PS Plug 2 -> 12v Wire 2 -> PM5


Rail 4 – Red PS Plug 5 -> 12V Wire 1 -> PM6
Rail 4 – Red PS Plug 5 -> 12V Wire 2 -> PM7
Rail 4 – Red PS Plug 5 -> 12V Wire 3 -> PM8


Rail 4 – Red PS Plug 6 -> 12v Wire 1 -> PM9


As for the actual wiring of the PMs, I crimped 4 lengths of ~30” 16AWG wire (1 yellow, 1 red, and 2 blacks) to the PM “Y-Connectors”. I then cut the modular ends off of the PCI-E/PS connectors that would typically go to the video cards and peripherals, and then crimped these wires to them per the layout above. Any unused wires were just taped off.

For all the actual crimps, I just use standard AMP style crimp connectors. Done with the right crimp tool and technique, I'd take these any day over soldering wire.


If you haven’t done it already, time to get your hands dirty!!

Wednesday, October 14, 2009

Pictures - Alpha Build

Here are some pictures of the Alpha Build. I'm getting a lot of questions in e-mail so I thought this might help those that just can't wait - and you know who you are :)!


EMS Alpha Build - Full Case


EMS Alpha Build - Just Drives


Server Side Drive Listing


Drive List - Client Side via Share


Power Usage on Initial Startup
(Startup/Surge Mode)


Power Usage - Standard "Run Mode"
(Post-Surge)


Power Usage with Drive Power Management Enabled


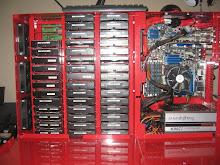
And finally, this is totally unrelated to the EMS, but is a picture of the "hard drive wall" which is just kind of cool! If you get really close you can see the 1s and 0s!!!


Tuesday, October 13, 2009

Design Goals

Before we get our hands dirty building the Extreme Media Server, let's talk a bit about the design goals.

Key items that I want for my EMS:
  • Easy, straight forward, quick access to any and all media files and drives
  • Ability to run programs at the server level (such as TVeristy to transcode files to play back on XBOX, etc.)
  • Use only basic/commodity type hardware whenever possible
  • Use Minimal runtime power
  • Generate minimal heat
  • Ability to run Virtual Machines for pet projects
  • Ability to install a high-end GPU/Graphics Card for potential server-side transcoding projects
  • Use a single power supply instead of the standard two supplies that BackBlaze typically uses
Maybe more importantly than what I want, is what I don't want:
  •  Hardware RAIDs
  •  Lack of power management capabilities for the drives
  •  Non Standard File Systems (in my case, I'll be using NTFS - for those in the Linux world, please don't hold this against me!)
So with that in mind, here's my build list:

1 - BackBlaze Custom 4U Server Pod Case
1 - Associated Parts - Nylon Mounts, Nylon Screws, 90 degree molex connectors, fans, etc.
9 - 5-Port SATA Backplanes with Integrated Port Multipliers
2 - 3124 Based Silicon Image Controllers (4-Port, 64-Bit PCI)
1 - 3124 Based Silicon Image Controller (4-Port, PCI Express)
1 - ASUS P6T Workstation Edition MB (i7 Based)
1 - Intel Quad i7 Processor
2 - 6GB DDR3 Memory Kits (12GB Total)
1 - PCI Express Video Card - basic for now
1 - 1200 Watt ToughPower Thermatake Power Supply with Modular Connectors
1 - Windows Server 2008R2 x64 with HyperV
1 - SATA Drive for Loading OS (i.e. Boot Drive)


I know I'll get a ton of questions on this, so let's talk a little turkey on the RAID setup.

Some of you will no doubt want to RAID your data for protection. I'm not a fan of anything more complex than mirrored RAID setups. I've lost enough data with drives in a typical RAID 5 setup that I frankly avoid them like the plague. Another consideration is that if this is going in a home, the usage is going to be extremely light. Keeping a RAID array powered up will use a lot of extra energy and generate a lot more heat. If you are like me and live in a Sun State, the last thing you need is more heat!

The other reason people want a RAID is for performance, but you'll never see it at the client level. The best connection that most will do with a server like this is a hard-wired gigabit network connection. A typically hard drive can read about 100MB/sec or 800Mb/sec. In short, your gigabit ethernet (i.e. 1000Mb/sec) will quickly become the bottleneck for your data transfers.

The good news is that I did a test with my test EMS box and I was able to stream 16 movies at once without a RAID.This was a mix of bitrates that is comparable to everything from iPod to DVD to BluRay. With all 16 movies playing/streaming, I used just over 100Mb/sec of bandwidth on my network wire and around 9 to 12MB/sec of disk throughput or only about 1/10 of what a decent desktop drive is a capable of outputting. For a typical setup of serving a few MP3s and a movie or two concurrently, you'll have more than enough bandwidth without a RAID for most users.

In short, RAID if you want, but you'll use more power and probably get no real world performance benefit. What you might get is data protection, but you have 45 slots for extra hard drives - it might be just as easy to script a backup to a spare HD or use BackBlaze for online backups :)

The next big choice is whether to use Linux or Windows. I know Microsoft Window Server like the back of my hand. I support it all day long and for me there really wasn't any other choice. At the end of the day, it is cheaper for me to use Windows Server 2008R2 as I'll spend much more in time learning the Linux side of things which is also a real cost for me. Either OS is great and both have support for Port Multipliers. Use what you are comfortable with or use it as opportunity to learn something new. I would also encourage you to use the 64-Bit Version of whatever OS you decide on.

If you've got an idea to make the EMS better, let me know. If I like it, I'll give it a try and post the results!

The covers the basics for now. Next up, installing and wiring up the port multipliers.

Wednesday, October 7, 2009

Background

First, let me give you some background...

Over the last 5 years I've been working on making an Extreme Media Server. What frankly started out as a competition between me and another tech at PC Perfect has ended up where all these things end up - one person going over the top and pushing beyond any level of sanity. I'm happy to report that someone is me!

The first solution was simple enough, a basic PC with a few hard drives hanging off it. Definitely NOT EXTREME, very standard and, if I may say so, really really really boring!

The second solution was a small rolling rack of Super Micro 3U cases. A nice solution no doubt, but what I call an "Uncle Sam Solution". You know - one you'd come up with if you have unlimited funds and don't care about energy usage, cooling, etc. - essentially solving the problem with money.

That brings us up to this year, when I came across a great article from BackBlaze talking about how they build their storage pods for their online backup service (http://blog.backblaze.com/2009/09/01/petabytes-on-a-budget-how-to-build-cheap-cloud-storage/). Wow - Wow - Wow! Someone had come up with a way to store 45 Drives in one reasonably sized case and had done it on a budget. With a little tweaking, I knew I could take their core design and end up with awesome Media Server. Sadly, my wife recognized the look in my eyes and feared the boxes she knew would be coming soon as well!

Before we continue, I want to take a moment and thank the great folks over at BackBlaze. They openingly published their design and have been great in answering what seems like a million of my questions and providing me invaluable guidance in tracking down parts to make this happen. Without their generosity, time, and openness, this frankly wouldn't have been possible.

For those of you who are long time readers of techdirt.com, you'll be familar with concept of sharing information and building a business model around it. It is very rare these days to find a company like BackBlaze that is so open with their designs/intellectual property. Most businesses protect and horde this type of information. I have the upmost respect for the folks running BackBlaze - they're definitely forward thinkers on top of their game!

Next up, the game plan/design criteria...

Tuesday, October 6, 2009

Extreme Media Server - Insanity Begins...

Face it - you're a little crazy. Frankly, you wouldn’t be reading this if you weren’t. Normal people don’t build, or think of building a 90TB Media Storage Server just for the fun it. Except for you and me that is… so buckle up and over the next couple weeks we’ll go on a journey to build the biggest, boldest Most Extreme Media Server (EMS) ever.

When we're done, you’ll have everything you need to build your own 90TB EMS that runs on only 200 Watts! Yep, that’s right, just 200 Watts for 90TBs of storage. That's about the same power usage as a XBOX 360 or Playstation 3 uses!

Be forewarned, this isn’t for those people who are happy hanging a USB Drive off their system. Frankly, this setup is overkill, over the top and borderline insane – yep, just my kind of project (and hopefully yours, too)…

Now sit back and enjoy the ride.